If you often send emails to specific groups of people, creating an Outlook contact group will allow you to send emails to the group without having to manually add each name to the recipient list. Contact groups are often used for groups such as project teams, recreation groups, families, and friends. A contact can belong to multiple Outlook groups.
Creating a contact group
- Click People on the Navigation bar.
![]()
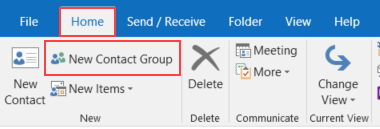
2. On the Home tab, click New Contact Group.
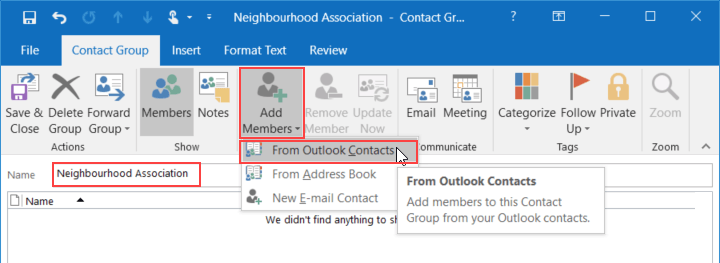
3. In the Contact Group box, enter the name of the group. In this example, we’re creating a group called Neighbourhood Association. Click Add Members and select one of the following:
- Select From Outlook Contacts – Add group members from your own Outlook Contacts.
- Select From Address Book – Add group members from the Address Book. If you’re using Outlook with a business email account, this option usually includes company contacts.
- Select New E-mail Contact – Create a new contact and add it to the group.
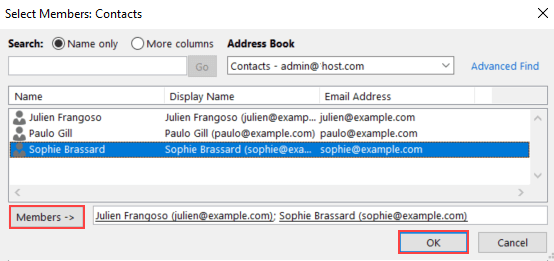
4. Select each contact you want to add to the group and click Members. When you’re done adding contacts, click OK, then click Save & Close.
Sending an email to a contact group
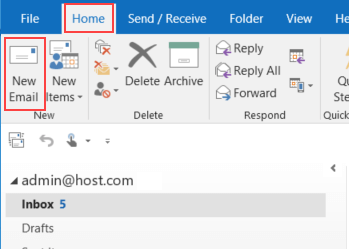
- Click Mail on the Navigation bar.
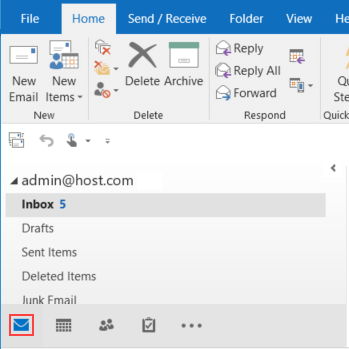
2. On the Home tab, click New Email.
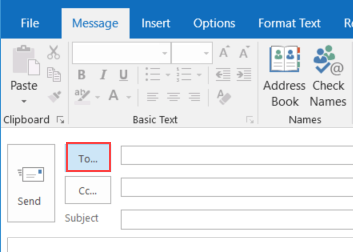
3. In the new email message, click To.
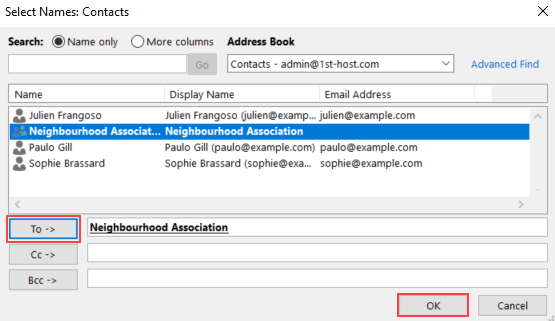
4. Select the contact group and click To, then click OK.
More information
For more information about working with Outlook contacts, check out the following articles in the HostPapa knowledge base:
- How to use contact categories in Outlook
- How to recover deleted contacts in Outlook
- How to manage contact lists in Outlook
- How to manage contacts in Outlook
If you need help with your HostPapa account, please open a support ticket from your dashboard.
